Brilliantly Easy Hack to Automatically Share Your Email Newsletter to Twitter, Facebook and More
Many small businesses we work with use their email newsletter as the primary tool to share content with their subscribers. They don’t have a blog and all the content they create is locked into email.
Many email service providers have created add-ons that give the creators the ability to share their newsletter across social media. However, these add-ons tend to be an afterthought and lack any customization features.
Whether you use MailChimp, Constant Contact or Vertical Response, this tutorial shows you how to add your newsletter content to social media using ANY email service provider. We’ll also show you how to personalize and customize the content for each social network. When your newsletter is sent, this hack will automatically create and send an update to your social media destinations.
No more copy and pasting to social media or being confined to limited customization features with your email service provider.
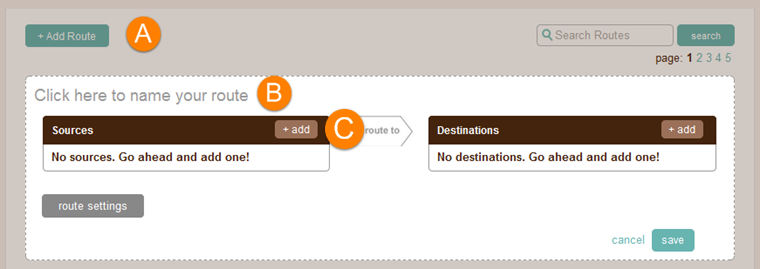
Step 1. Create a ‘Route’ and name it
If you don’t have a dlvr.it account, you will need to create one. For more details on setting up dlvr.it, read our Getting Started Guide. If you already have a dlvr.it account, jump right in:
A. Click +Add Route
B. Name your new Route
C. Click +add
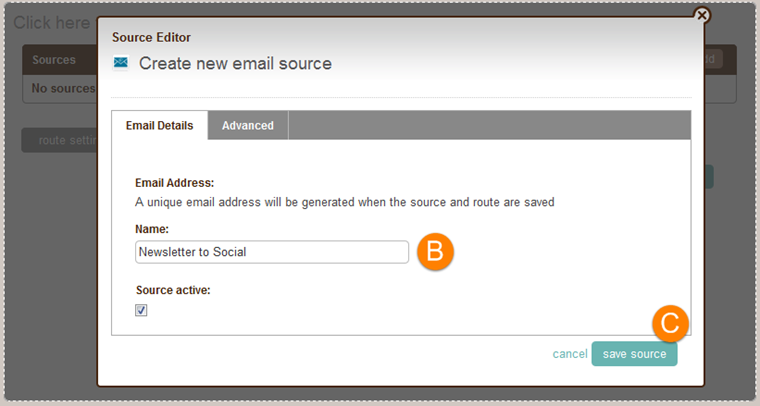
Step 2. Add ‘Email’ as a source input
A. Select the email icon from the source input choices
![]()
B. A lightbox will appear. Name your email address
C. Click Save
* Note: a new email address will be generated once the entire Route is created and saved.
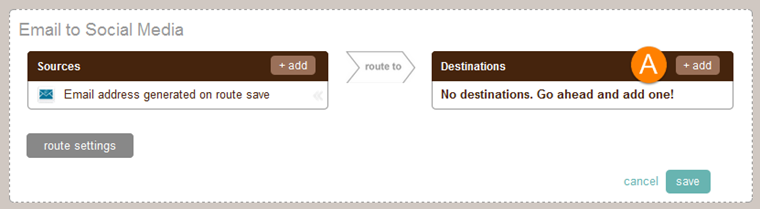
Step 3. Add and personalize social media sites
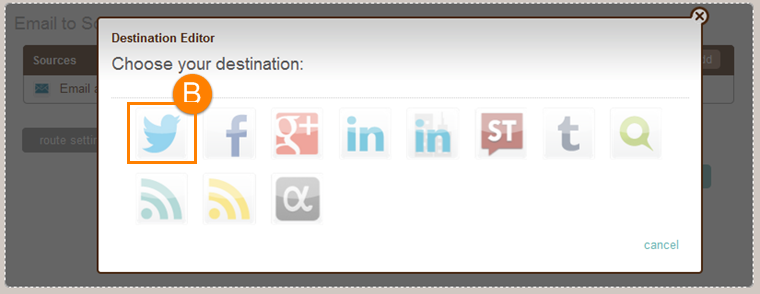
A. Click +add on the Destination side of the Route to select the social networks
B. Choose one or more social networks. In this example, we’ll use Twitter.
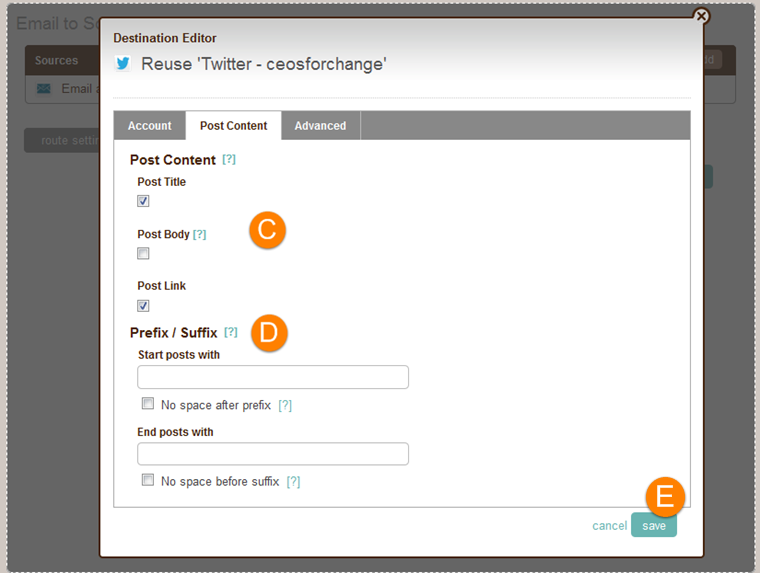
You will see several options to personalize the content on Twitter (and the other social networks of choice).
C. Customize the amount of content you want to appear (headline/body/link)
D. Add hashtags, or any static prefix or suffix to personalize the experience on each social network
E. Click save
Step 4. Copy the email address and add it to your newsletter distribution list
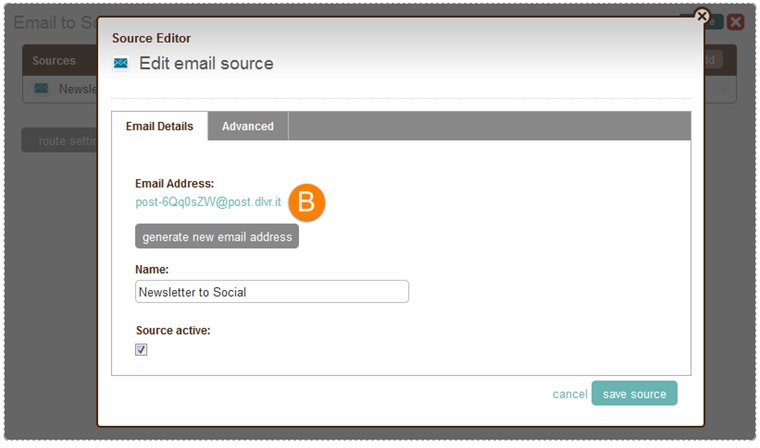
A. Go to your new route. Scroll over the Source. Click the “pen” icon that appears.

B. Copy the email address that was generated and add it to your newsletter distribution list
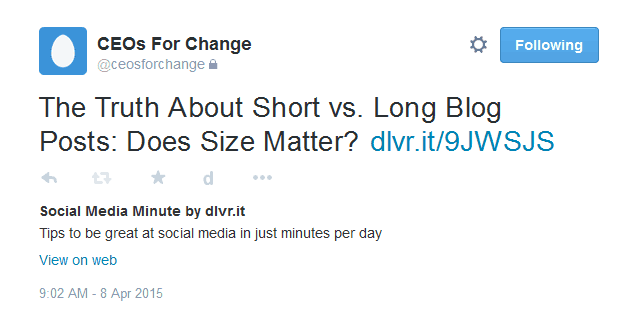
Next time you send your newsletter, dlvr.it will automatically create and send an update to your social networks. In our example, the tweet contains the subject line and summary text that was pulled from the email template. Any hashtag or static prefix/suffix that was added during the set-up process will also appear. When readers click the URL in the tweet, they are taken to the online version of the newsletter. Click to see a live example.
 Advance User Controls
For even more customization controls, check out these additional tutorials:
A. Use Google Analytics or any third party tool to track performance on each social network
B. Control what content appears by adding filters


