
How to Link Facebook to Twitter With SMART Automation
The subtle nuances of when to post, why to post and where to post on social media, can be overwhelming. This uncertainty is especially true for small businesses. To make posting across multiple networks simple, Facebook offers an easy way to link Facebook to Twitter. And, so does Twitter as discussed in our post on How to Link Twitter to Facebook with Smart Automation.
However, the one-stop shop approach of posting content from one social media platform to another, in one (or two) simple keystrokes (e.g., link Facebook to Twitter and Twitter to Facebook), may be acceptable for some, but it all depends on your intent and audience.
As a user, I find it annoying when people constantly cross-post. There’s a reason why we’re friends on Facebook and a reason why I follow people on Twitter – but the reasons are quite different. If I want to see what you tweet, I’ll follow you on Twitter, but I don’t necessarily want to be your friend on Facebook. – Found on Quora in response to the question: What are the pros and cons of having Twitter crosspost to Facebook?
Option #1: Link Facebook to Twitter via the Facebook Interface
Pros: Automatically connecting Facebook to Twitter
- Automation saves you time.
The time-saving nature of automation is true. But, how many times a day, week or month do you post on Facebook vs. Twitter?
For example, every social media platform offers different ways to connect, and the way you share information and connect with people through Facebook is very different to the way you would connect through Twitter.
Twitter is fast-paced, you can Tweet ten times a day and not be seen to be bombarding your followers, however, if you posted at this frequency through Facebook, this could be overkill.
Cons: Automatically connecting Facebook to Twitter
Publishing a Facebook post to your Twitter (or vice versa) may seem like a good idea, “killing two birds with one stone”, but none of your Facebook friends or Twitter followers will be thankful that you did… in fact, it may cause quite the opposite reaction. – Stir Up Media
- Your followers follow you on TWITTER because they want to read your TWEETS and your Facebook followers are “liking” your page because they want to see your posts… they don’t want to be sent away to an entirely different social media platform to read what you have to say; it annoys the heck out of the majority of them.
- Your Facebook posts can be much longer but will be cut off after 114 characters (or so) to include a link to the complete post.
- While hashtags are well established on Twitter, they are not very common on Facebook and make no sense to most people. Using hashtags through Twitter may also not quite make sense through Facebook, or when tagging a business or name through Facebook – it won’t translate and connect through Twitter on an auto-post – they simply don’t quite marry when you connect them in this way.
How to Auto Link Facebook to Twitter (from Facebook)
Step 1: Go to facebook.com/twitter and click on the ‘Link to Twitter‘ button. You can connect your personal profile (at the top) and/or any of your Facebook pages, all from this page.
Note: You must be logged in to the Twitter account you are trying to link.
Step 2: From here, it will take you to a prompt to authorize Facebook to use your account. If you are not logged in, you will need to enter your Twitter username and password first.
Step 3: Once you click on ‘Authorize app‘ it will redirect you back to Facebook where you see the following screen and can select what type of content you’d like to share by clicking on the boxes.
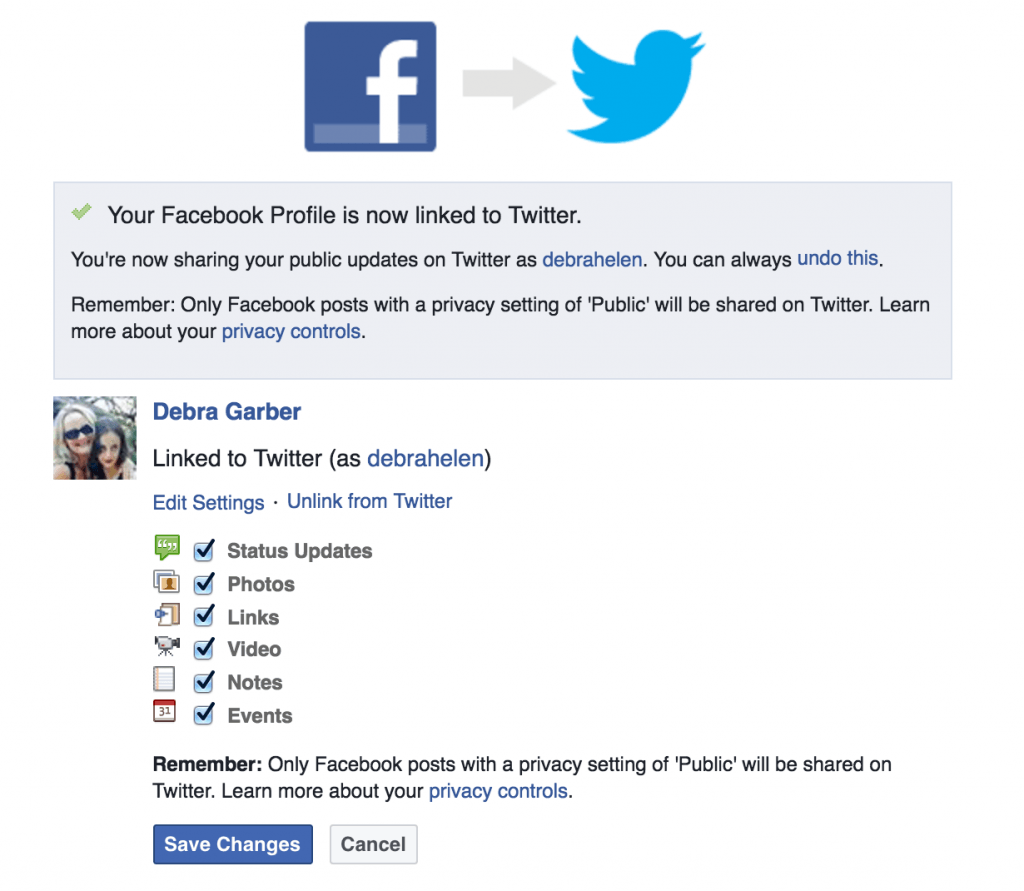
Here you can decide how much information you want to share on Twitter then click ‘Save Changes‘ and you’re all set!
Now you’ll be able to simply post a status update on Facebook that will keep you from having to log into both services and post two separate updates.
HUM…are you sure this is what you want to do?
***Note: since Twitter has a 140 character limit, it will automatically truncate your post with an automatically created short URL that will link back to the original post on Facebook.
HUM…
I’m not going to sugar coat this…the easier solution is to connect Facebook to Twitter directly through the Facebook interface.
However, with a few extra steps using Zapier + dlvr.it (option #2 below), you have much more control over what to send, how often and when.
Option #2: Link Facebook to Twitter via dlvr.it with smart automation
Pros:
1 – dlvr.it uses smart social media automation
This solution is very different from the automation used by Facebook in option #1 above.
With dlvr.it, you have as much automation as you need.
- Need complete automation? We’ve got it!
- Prefer to touch every post that goes out? We’ve got that too.
- Need something in between. We’ve got exactly the right amount of automation for your needs.
To put it another way, that’s what smart Social Media automation is all about.
2 – dlvr.it allows you to share just the right amount of automation for your social media needs.
- Hands-free auto-posting
- Handcrafted curated posts on an optimized schedule
- Fine tune sharing based on keywords, author, tags and more
Cons:
- The major drawback is the amount of time needed (initially)
It takes a few extra minutes to work on setting up dlvr.it and then using Zapier to string together an RSS feed. But, once completed, you’re ready to go – use as much or as little automation as you need.
How to Link Facebook to Twitter – the smart automation solution
Step 1: You’ll need to create an RSS feed using a tool called Zapier. Don’t fret; this may take an extra few minutes, but you’ll have to do this just once.
Once done, follow the steps below to create a Facebook RSS feed.
This recipe will make it incredibly easy to supercharge your social media and dlvr.it accounts.
Get Started
- Click ‘Make a Zap!’. You will land on an editing page where you can tell Zapier what data to pull and where you want to put it. You can name your Zap in the top left corner of that page.
Choose a Facebook Page
Next, you need to tell Zapier, which Facebook Pages account to grab data from.
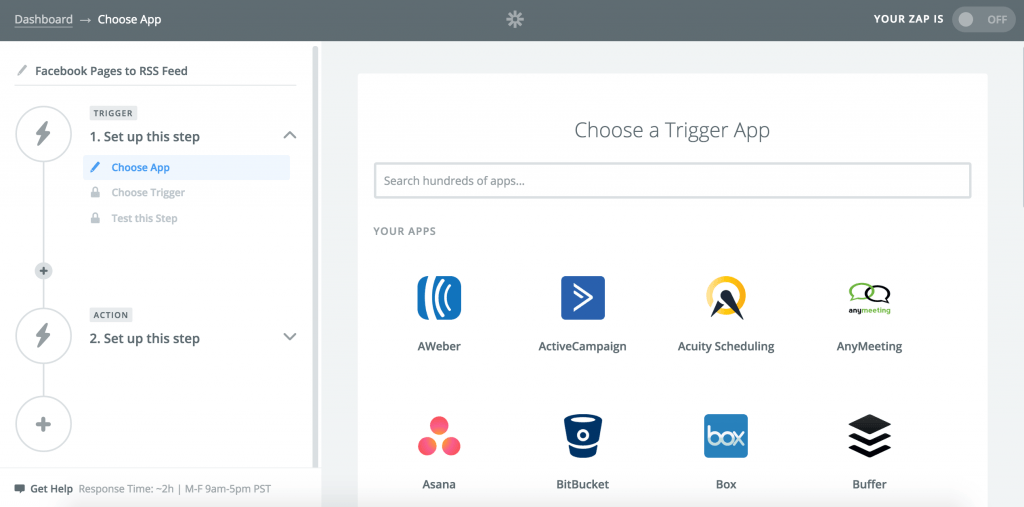
- In Step 1 (the Trigger step) of the Zap, type ‘Facebook Pages’ in the ‘Choose a Trigger App’ search bar.
- Select ‘New Page Stream Post’ and then click ‘Save + Continue’.
- Select ‘Connect a New Account’ and enter your Facebook email address and password in the pop-up box. Then click ‘Save + Continue’.
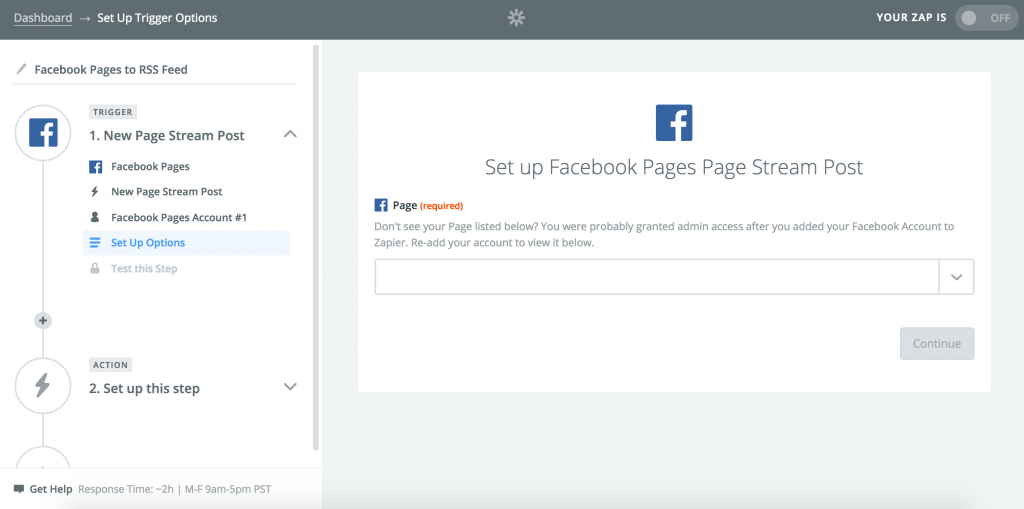
- From the drop-down box, choose a Facebook page. Click ‘Continue’.

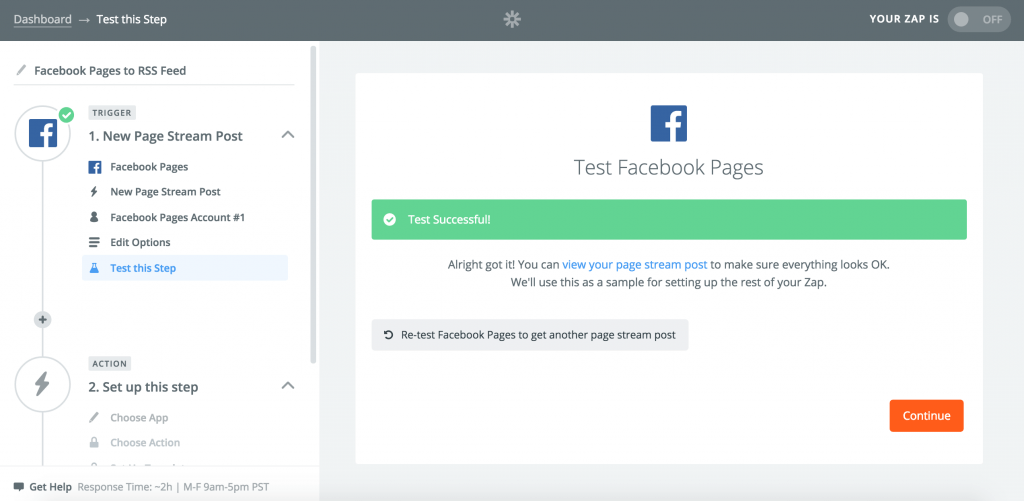
- Make sure you have one recent page stream posted to the Facebook page you selected. Then click ‘Fetch + Continue’.
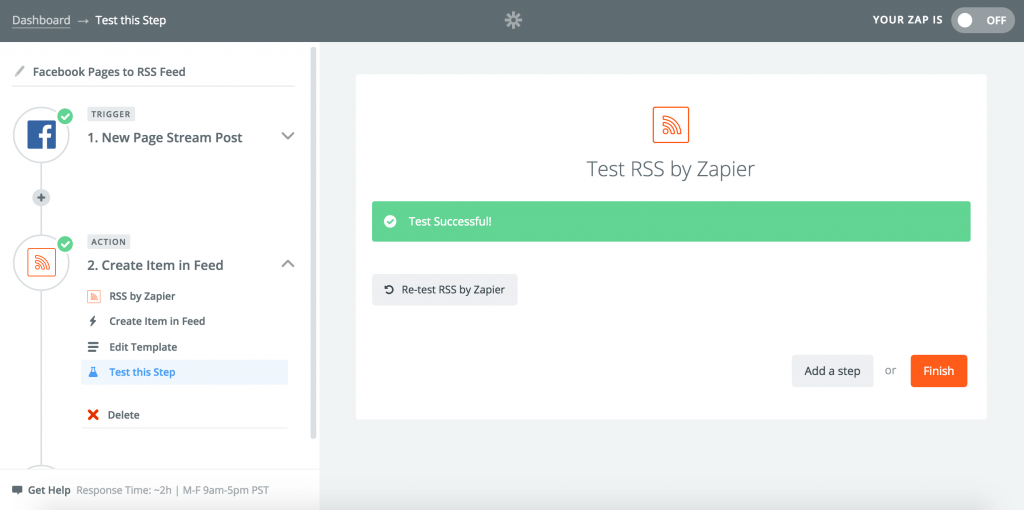
- Once you see the ‘Test Successful’ message, click ‘Continue’.

Configure the RSS Feed
- In Step 2 (the Action step) of the Zap, type ‘RSS by Zapier’ in the ‘Choose an Action App’ search bar.
- Select ‘Create Item in Feed’ and then click ‘Save + Continue’.
- Now you can fill in the fields to customize the Zap. Play around with the settings to format your RSS feed.
- Click the drop-down arrows on the right side of each field to show the fields that are available to add in each section. You can copy the settings we selected below. Click to see how the RSS feed formatted with these settings.
- Name your RSS feed and click ‘Copy to clipboard’.
- Add a Title. We chose the ‘Message’ field.
- The Source URL is where the feed item should link. Choose ‘First Action Link’.
- Next, add the body content of the feed item. With the limited options available, we opted to show the ‘Message’ field which means the title and the body content will be the same in the feed.
- The Author name, Author link, and other fields are optional.
- Click ‘Continue’.
- Click ‘Create + Continue’ then wait for the ‘Test Successful’ message and click ‘Finish’.
Save the RSS Feed
- Choose a folder to store your Zap in (optional).
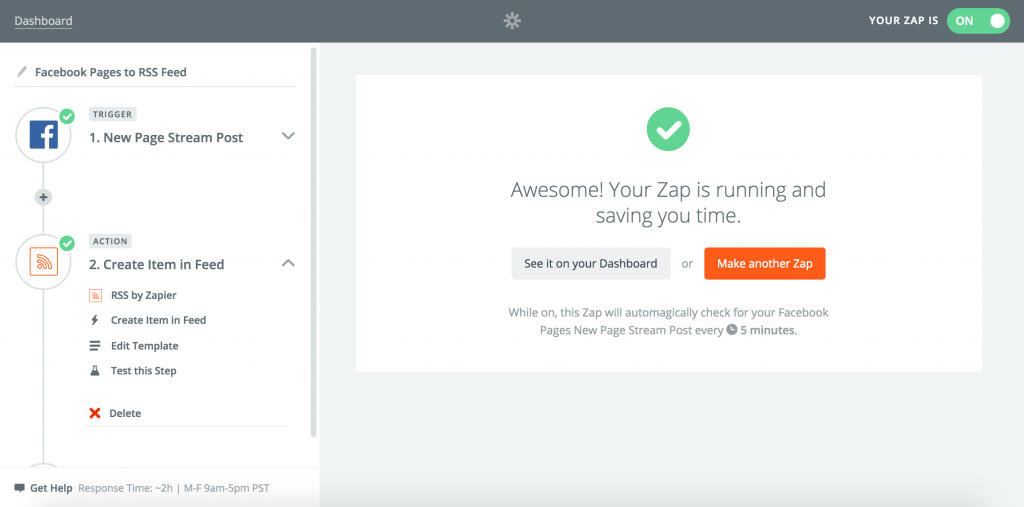
- Toggle the Zap to ‘On’ and wait for the green checkmark to appear.
Share your Facebook Page Updates
Add the new Facebook RSS feed URL to dlvr.it. Route the updates to link Facebook to Twitter, LinkedIn, Tumblr and more. When you click on the links inside the content, readers are redirected back to Facebook to consume the entire update. Here you will also be able to customize the RSS feed a bit further by automatically adding hashtags, prefixes, and optimized schedules.
What Next? How to maximize your Facebook RSS feed
dlvr.it’s smart social media automation is all about how little or how much you want to automate to link Facebook to Twitter and your other social networks.
1 – If you don’t want to send everything from Facebook to your other social accounts, use Filters.
2 – Does scheduling makes sense for you? If so, make sure to schedule at the right time.
3 – Looking for content to share? dlvr.it’s content curation feature keeps your customers, fans and followers engaged with a consistent stream of content. Simply search for the type of content your audience would love, and start sharing.
___
In Conclusion
1 – If you don’t post a lot of content on Facebook, automatically connecting Facebook to Twitter directly through Facebook’s app might not make a difference to your Twitter followers. My suggestion is to use option #1 above – it makes perfect sense for your needs.
2 – However, to take full advantage of all that dlvr.it offers through its smart automation features, follow option #2 above to link Facebook to Twitter and vice versa.


